Affiliate Disclaimer: This post contains affiliate links, and as an Amazon Associate we earn from qualifying purchases. If you buy through our links, we may earn a small commission at no extra cost to you. We only recommend products we genuinely believe you will enjoy.
📘 Recommended for beginners: Complete Starter Guide to Whittling
With over 300,000 copies sold, this classic has introduced more people to whittling than any other guide. Inside are 24 easy, confidence-building weekend projects, the four essential knife cuts, safe carving habits, blade sharpening, and ready-to-carve patterns with clear step-by-step photos. All you need is a pocketknife, a twig, and this book, with no prior experience required.
Owls are one of the most popular subjects in all of wood carving, and it is easy to see why. Their round bodies and large eyes read clearly even when the carving is simple, so a beginner can produce something that genuinely looks like an owl on the very first try. Their feathers give more advanced carvers endless texture to explore. An owl works for almost every skill level, which is rare in a single subject.
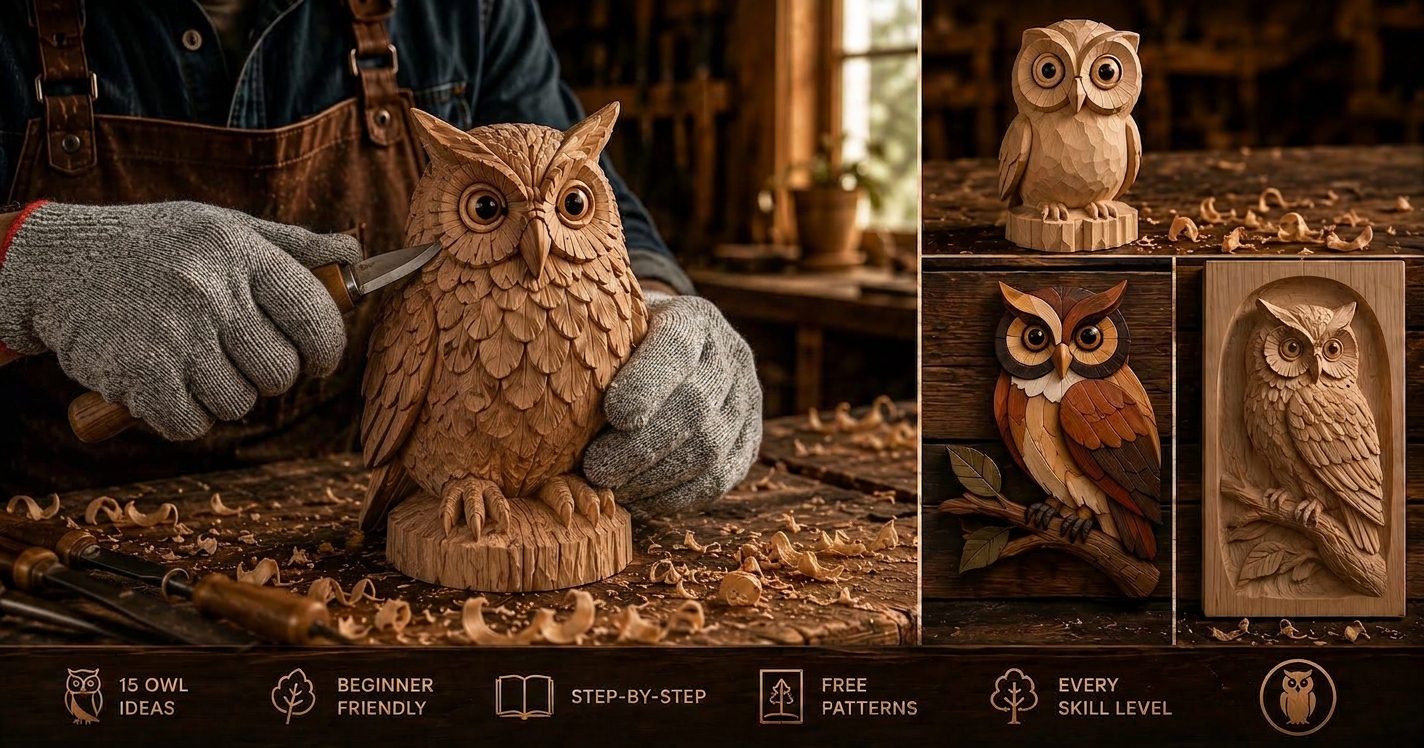
This guide walks through fifteen wooden owl carving ideas, from the simplest whittled owl to detailed relief and power-carved pieces. Along the way you will find the tools that make owls easier, the small tricks that bring them to life, and where to find patterns to work from.
Why owls are a great subject to carve
A carving succeeds or fails on its silhouette and its focal point. Owls give you both for free. The silhouette is a simple rounded form, close to an egg or a pinecone, so the rough shaping is forgiving. The focal point is the face, and because owl faces are so distinctive, even a basic pair of eyes and a beak reads instantly as an owl. That combination is why owls show up in beginner carving books again and again.
Owls also scale beautifully. You can carve a tiny owl the size of your thumb as a pocket charm, or a foot-tall statement piece for a shelf, using the same basic approach. And because owls come in so many real species, you have natural variety to draw from without inventing anything.
Tools that make owl carving easier
You can carve a simple owl with a single whittling knife, but a few extra tools help once you start adding feathers.
- A general carving knife for roughing out the body and shaping the head.
- A detail knife for the eyes, beak, and the edges of the facial disc.
- A small V-tool or veiner, which is the fastest way to suggest layered feathers. Rows of small V cuts read as feathers without carving each one individually.
- A cut-resistant glove for the hand holding the wood.
- Basswood, the friendliest wood for this kind of detail.
If you own a rotary tool such as a Dremel, it can speed up feather texturing and hollowing, but it is not required. Plenty of stunning owls are carved with a knife alone.
Fifteen wooden owl carving ideas
These are arranged roughly from easiest to most involved, so you can start where your skills are and work up.
- The simple whittled owl. A rounded body, two large eyes, a small beak, and a hint of ears. No feathers, just a clean friendly shape. This is the ideal first owl.
- The pocket owl. A thumb-sized version of the simple owl, smooth and rounded, perfect as a worry stone or a small gift.
- The stylized modern owl. Clean geometric planes instead of realistic feathers. Faceted surfaces catch the light and give a contemporary look that suits modern decor.
- The horned or great horned owl. Adding prominent ear tufts changes the whole character and gives you a more dramatic silhouette to carve.
- The owl family. A parent owl with one or two owlets tucked beside it. A charming display piece and a good exercise in proportion.
- The barn owl. Defined by its heart-shaped facial disc and pale coloring. The face is the star, so this is a good project for practicing the facial disc.
- The snowy owl. Left in pale wood or finished white, this one shines as winter and Christmas decor. Pair it with a simple perch.
- The owl on a branch. Carve the owl and a section of branch together from one block so the bird has a natural base to grip.
- The chip-carved owl. Suggest feathers with clean triangular chip cuts rather than flowing texture. A tidy, geometric approach that looks striking.
- The feathered relief owl. Instead of a figure in the round, carve an owl in relief on a flat panel. This lets you focus on layered feather texture without shaping a whole body.
- The intarsia owl. Not carved from one block but assembled from different wood tones cut to shape. Intarsia owls are gorgeous wall art and use the natural color of the wood for the feather pattern.
- The owl ornament. A small flat or lightly shaped owl with a hole for a ribbon. Quick to make and popular as a holiday gift.
- The owl walking stick topper. Carve an owl at the top of a staff or cane. A classic that combines a useful object with a display of skill.
- The power-carved realistic owl. Using a rotary tool to texture individual feathers and burn in detail. This is the advanced end, where the goal is lifelike realism.
- The owl bowl or spoon handle. Incorporate a small owl into a functional piece, such as the top of a spoon handle or the rim of a small bowl.
How to carve a simple owl, step by step
If you want to start today, here is the basic sequence for the simple whittled owl. It applies to most of the beginner owls above.
- Draw the shape. Sketch a rounded body on the front and side of your basswood block. Owls are wider at the bottom and taper slightly toward the head.
- Rough out the form. Remove the corners of the block and bring it down to a smooth egg-like body. Do not add any detail yet. Just get the overall shape right.
- Set the head. Make a shallow stop cut where the head meets the body if you want a defined neck, or keep it as one smooth form for a simpler look.
- Place the eyes. The eyes are everything on an owl. Mark two large circles high on the face, close together. Carve a shallow recess around each so the eyes sit in a disc. This single step is what makes it read as an owl.
- Add the beak. A small downward triangle between and just below the eyes. Keep it modest. Beginners often carve the beak too large.
- Suggest the wings and feathers. Use light V cuts or simple curved lines down the body to hint at folded wings. You do not need to carve every feather.
- Refine and sand. Clean up your cuts. Sand if you want a smooth finish, or leave the knife facets if you like the hand-carved look.
- Finish. Seal with oil or wax. You can paint the eyes for contrast or leave the whole piece natural.
Small tricks that bring an owl to life
A few details make the difference between a shape and a character.
- The eyes carry the personality. Large eyes look wise and gentle. Slightly narrowed eyes look fierce. Deciding the expression before you carve helps you commit.
- Sink the eyes into a disc. Real owls have a facial disc that frames the eyes. Even a shallow recess around the eyes adds instant realism.
- Layer feathers from the bottom up. When you do add feather texture, work in overlapping rows from the belly upward, the way real feathers lie.
- Keep the beak small. It is a common beginner mistake to oversize the beak, which makes the owl look more like a different bird.
Common owl carving mistakes and how to avoid them
A few predictable mistakes trip up beginners, and knowing them in advance saves a lot of frustration.
- Flat eyes. The most common issue is leaving the eyes on the surface instead of setting them into a recessed facial disc. Even a shallow recess around the eyes transforms a flat shape into a believable owl. Sink the eyes and the whole face comes alive.
- An oversized beak. Beginners often carve the beak too large, which pushes the owl toward looking like an eagle or a generic bird. Keep it small and tucked between the eyes.
- Adding feathers too early. If you start texturing feathers before the body shape is finished, you carve them away as you keep refining. Get the form right first, then add texture last.
- Uneven eyes. Because the eyes carry the whole expression, even a small difference in size or placement is obvious. Mark both eyes carefully before you carve, and check them from straight on as you go.
- Over-sanding. Sanding away every tool mark can make a carving look soft and lifeless. On a rustic owl, leaving some crisp knife facets often looks better than a completely smooth surface.
Choosing which owl to carve first
If you are not sure where to begin, start with the simple whittled owl from the list above. It gives you a friendly rounded shape, a clear place to practice the eyes and facial disc, and a finished piece that looks like an owl even if your cuts are not perfect. Once you are comfortable with the eyes and the basic body, the horned owl and the barn owl are natural next steps, since they build on the same foundation with one new feature each. Save the feathered relief owl and any power-carved realistic owl for after you have a few simple ones behind you. Working up in small steps like this is far more rewarding than starting with the hardest owl and getting discouraged.
Where to find owl carving patterns
A good pattern shows the owl from the front and the side so you can transfer the proportions to your block. You will find free and low-cost owl patterns in carving pattern bundles, in woodcarving magazines, and shared across carving communities online. Animal whittling pattern sets almost always include an owl, since it is such a staple. Print the pattern to match your block size, trace the profiles on, and carve to the lines.
Finishing and displaying your owls
Owls look great with very little finish. A coat of boiled linseed oil or a paste wax deepens the natural color of basswood and gives a soft sheen. If you want the eyes to pop, a touch of paint or a wood burner adds contrast. For a rustic look, leave the tool facets visible rather than sanding them away. Mounted on a small slice of branch or a simple base, even a beginner owl becomes a display piece worth keeping.
Take your projects further
Owls are a wonderful subject to return to again and again, because you can keep raising the difficulty as your skills grow. And once carving has you hooked on making things from wood, you may want to try larger builds too, from birdhouses to shelves to furniture.
Explore 16,000+ Woodworking Plans →
Start with the simple whittled owl, get comfortable with the eyes and the facial disc, and work your way up the list. By the time you reach the feathered relief owl or your first intarsia piece, you will have built real carving skills one owl at a time.