Affiliate Disclaimer: This post contains affiliate links, and as an Amazon Associate we earn from qualifying purchases. If you buy through our links, we may earn a small commission at no extra cost to you. We only recommend products we genuinely believe you will enjoy.
📘 Recommended for beginners: Complete Starter Guide to Whittling
With over 300,000 copies sold, this classic has introduced more people to whittling than any other guide. Inside are 24 easy, confidence-building weekend projects, the four essential knife cuts, safe carving habits, blade sharpening, and ready-to-carve patterns with clear step-by-step photos. All you need is a pocketknife, a twig, and this book, with no prior experience required.
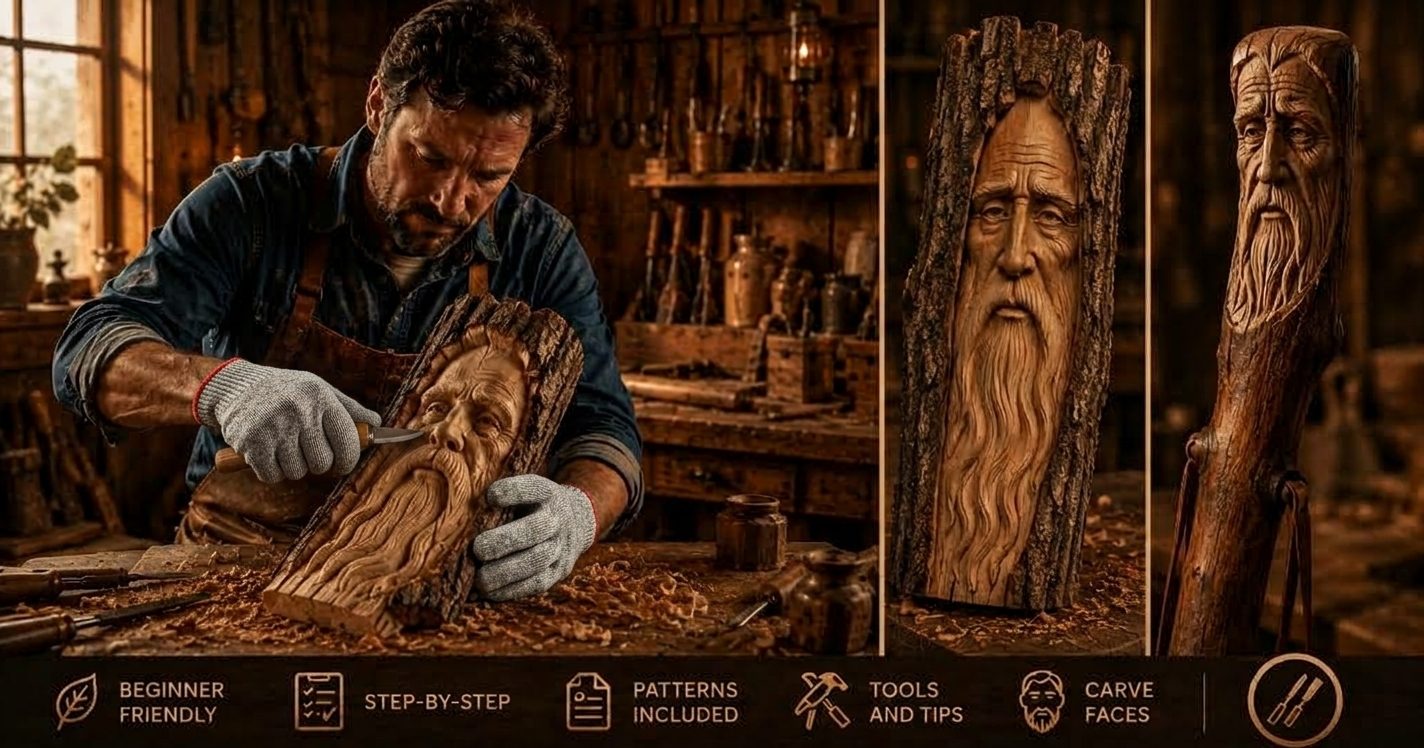
Wood spirit carving is one of the most characterful corners of the whole craft. A wood spirit is a face, usually an old, wise, weathered face, carved into a branch, a walking stick, or a block of wood. The tradition has deep folk roots, and the appeal is easy to understand. You are coaxing a face out of a piece of wood, and no two ever come out the same. Each one has its own personality.
Wood spirits also happen to be a great learning project. Carving a face teaches you more about depth, planes, and proportion than almost anything else, and because wood spirits are meant to look rugged and old, small imperfections add to the character rather than spoiling it. This guide covers the wood, the tools, and a clear approach to carving your first wood spirit, along with tips and patterns to work from.
What is a wood spirit?
A wood spirit is a carved face that seems to emerge from the wood itself. Traditionally it has a long flowing beard, a strong nose, deep-set eyes, and often a hood or hair that blends into the grain. Carvers often work them into the natural shape of a branch or a walking stick, so the face follows the curve of the wood and the beard trails down the length of it. Some are small enough to hold in your palm. Others run the length of a full staff.
The style is forgiving on purpose. A wood spirit is supposed to look old and characterful, so you are not chasing perfect symmetry or smooth youthful features. That is exactly what makes it such a good subject for a beginner who wants to learn faces.
Choosing your wood
Two woods are especially popular for wood spirits.
- Basswood. The reliable all-round beginner wood. Soft, even grained, and carves cleanly. A basswood block or a basswood branch is a great place to start.
- Cottonwood bark. This is the traditional favorite for wood spirits. It is soft, thick, and carves like butter, and its natural texture suits the rugged look. If you can find it, it is a joy to carve, though it can be more expensive and harder to source than basswood.
You can also carve a wood spirit into a found branch. If you do, make sure the wood is dry, or expect some cracking as it seasons. A slightly curved branch gives the face a natural flow that is hard to beat.
Tools you will need
Wood spirits reward a slightly broader tool set than a simple whittling project, because faces are all about controlled depth.
- A carving knife for general shaping and the beard.
- A detail knife for the eyes, nostrils, and fine lines.
- A V-tool or veiner. This is the workhorse for wood spirits. It carves the flowing lines of the beard and hair quickly and cleanly.
- A couple of gouges. A shallow gouge and a deeper one help you hollow the eye sockets and shape the cheeks and brow.
- A cut-resistant glove for the holding hand.
You can carve a simple wood spirit with just a knife and a V-tool, so do not feel you need a full set to begin. Add gouges as you find you want them.
Understanding the face before you cut
The single most useful thing you can do is understand the basic layout of a face. On a wood spirit, the features stack in a predictable order from top to bottom: the forehead and brow, then the eyes set into their sockets, then the nose projecting forward, then the mustache and mouth area, and finally the long beard flowing down. The nose is the high point that sticks out furthest, and everything else sits back from it.
Think of the face in terms of the wood you remove around the nose. The nose stays near the original surface, and you carve away from it to set back the eyes, cheeks, and beard. Holding that idea in your head keeps you from carving too flat, which is the most common beginner mistake with faces.
Carving your first wood spirit, step by step
- Mark a center line. Draw a line straight down the middle of your wood. This keeps the face symmetrical enough and gives you a reference for placing the nose and eyes.
- Block in the nose. Mark the length and width of the nose along the center line. Make a stop cut across the bottom of the nose, then carve back below it to begin setting the nose forward. The nose is your anchor, so establish it first.
- Set the brow and eye sockets. Above and to the sides of the nose, carve away wood to sink the eye sockets back and leave the brow standing forward. Deep-set eyes are what give a wood spirit its wise, weathered look.
- Shape the eyes. Inside each socket, carve the eyeball and the lids. Wood spirits often have hooded, half-closed eyes, which are easier than wide-open eyes and add to the character.
- Refine the nose and add nostrils. Narrow the nose to shape, then use the tip of your detail knife to add the nostrils.
- Carve the mustache and mouth. Below the nose, shape a flowing mustache that sweeps out to the sides. The mouth usually hides mostly under the mustache, so you only need to suggest it.
- Flow the beard. This is the fun part. Use your V-tool to carve long, flowing lines down from the mustache and cheeks to form the beard. Vary the lines so they weave and split like real hair. The beard can flow the full length of a branch or staff.
- Add the hair or hood. Frame the top of the face with flowing hair or a simple hood, using the same V-tool strokes as the beard.
- Refine and finish. Deepen any lines that need it, clean up your cuts, and decide whether to sand lightly or leave the tool marks for a rugged look.
Tips for a better wood spirit
- Keep the nose proud. If your face looks flat, you almost certainly have not set the eyes and cheeks back far enough from the nose. Depth is everything.
- Let the beard flow with the grain. Long V-tool strokes are cleaner and easier when they run with the grain of the wood, which also suits the natural downward flow of a beard.
- Embrace asymmetry. A perfectly symmetrical wood spirit can look stiff. Slight differences between the two sides make the face feel alive and old.
- Work top to bottom for the hair and beard. Overlapping strokes read as flowing hair when they layer in one direction.
- Keep your tools sharp. Clean V-tool and gouge cuts depend on a keen edge. Dull tools tear the fibers and leave fuzzy lines.
Common mistakes when carving faces
Faces are one of the more challenging subjects, so a few mistakes are almost universal among beginners. Knowing them ahead of time makes your first wood spirit much smoother.
- Carving too flat. This is the big one. If the face looks like a drawing rather than a sculpture, you have not set the eyes and cheeks back far enough from the nose. Wood spirits need real depth, so commit to hollowing those areas.
- Placing the eyes too high. On a real face, the eyes sit around the middle of the head, not up near the top. Beginners often crowd all the features into the top half. Give the forehead its space.
- A nose that is too narrow or too short. The nose is the anchor of the whole face. Keep it substantial, especially on an old, weathered wood spirit, where a strong nose adds character.
- Rushing the beard. The flowing beard is what people notice, and hurried, shallow lines look flat. Take your time with the V-tool, vary the direction of the strands, and let some lines split and weave.
- Chasing perfect symmetry. A face that is too even looks stiff and artificial. Small differences between the two sides make a wood spirit feel alive and aged, so do not panic if the sides are not identical.
Carving a wood spirit into a walking stick
One of the most satisfying ways to use this skill is to carve a wood spirit into the top of a walking stick or staff. The tall, narrow shape is a natural fit, because the face sits at the top and the beard flows down the length of the stick, following the grain. Choose a straight, dry stick with a diameter large enough for the face, and remove the bark where the carving will go. Carve the face using the same steps as above, then let the beard trail down as far as you like with long V-tool strokes. A wood spirit walking stick combines a useful object with a display of your carving, and it makes a memorable gift. Just be sure the wood is fully dry before you start, or the stick may crack as it seasons around your carving.
Finishing your wood spirit
Wood spirits look wonderful with a natural finish that emphasizes the depth of the carving. A coat of boiled linseed oil or Danish oil soaks into the wood, deepens the color, and makes the shadows in the beard and eye sockets stand out. A wax over the top adds a soft protective sheen. Some carvers apply a light stain or an antiquing glaze that settles into the recesses and highlights the flowing lines, which suits the old and weathered character perfectly. If you carved into a branch, seal the exposed wood well to slow any future cracking.
Where to find wood spirit patterns
While experienced carvers often work freehand, a pattern helps enormously when you are learning faces. Look for beginner wood spirit patterns that show the placement and depth of each feature, since depth is the part that is hardest to judge from a flat drawing. Carving pattern bundles, woodcarving magazines, and carving communities all share wood spirit and face patterns. Start with a simple design that has a clear nose, hooded eyes, and a flowing beard, and save the more intricate faces for once you understand the basic planes.
Where to go next
Carving faces is a skill that pays off across the whole craft. Once you can carve a wood spirit, caricature figures, Santa faces, and other character carvings become far more approachable, because they all rely on the same understanding of planes and depth. If you are still building your basics, our guide to easy wood carving projects for beginners is a good companion to this one.
And if carving draws you toward larger woodworking builds, from walking sticks to furniture, a full library of plans makes those projects much easier to take on.
Explore 16,000+ Woodworking Plans →
Find a piece of basswood or a dry branch, draw your center line, and start with the nose. Take it slowly, keep the nose proud and the eyes deep, and let the face emerge. Your first wood spirit will have a character all its own, and that is exactly the point.